Showing posts with label Tutorial. Show all posts

Friday, March 23, 2012

Finished Object Friday - Mop Cover (And Tutorial!)

Whew. I don't know about you, but March has been a busy month for us! I've been so busy enjoying things, that I haven't taken much time to blog about them! It's pretty crazy when my last post was a Finished Object Friday post. Oh, well...


I had been wanting for a while to try to make a cover for my mop.
Here is a list of the supplies that I used:
Cotton fabric - One 6x12 inch piece
Terry Cloth - two 6x12 inch pieces
Velcro (just the soft "fuzzy" side)
Ribbon

Tools:
My Rotary cutter and Mat
Pins
Fabric Marker
Sewing machine!

Using the original mop cover, I figured out that my cutting ruler (6x12 inches) was just about the right size for a pattern. So I just cut each piece to that size.


 I actually cute two pieces of terry cloth and stitched them together with two seams down the middle. (That's where the pen came in handy - I just laid them flat on top of each other and after tracing two lines, just sewed straight down.)

I then sewed two strips of the velcro (both the fuzzy part) to the right side of the cotton "fun" fabric. This is what holds the cover to the mop. I tried just using terrycloth for a simple cover, but the terry cloth got really snagged in the barbs of my mop. I don't think it would have lasted through many uses!

Next, I was ready to make my "cover sandwich!" I made a loop out of fun ribbon for a little hanger for the pad. Layer with the terrycloth first, then the loop of ribbon (loop facing inside) and the cotton fabric with the right side and velcro facing down. Then sew around the perimeter leaving an opening to turn.


Clip the corners to help it lay flatter before turning right side out.

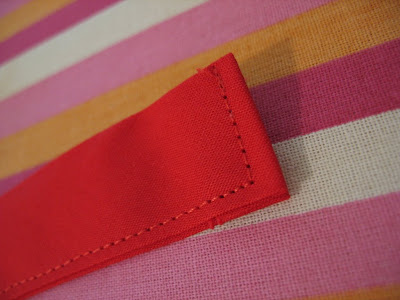
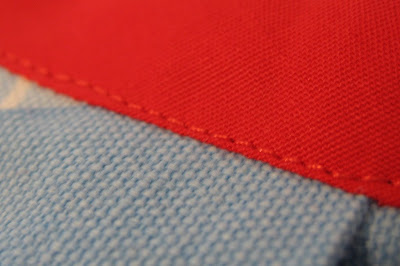
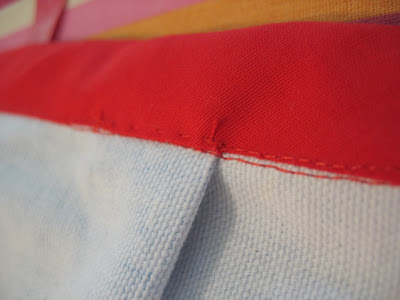
Pin opening closed and sew a top stitch around the outside.


And the good news - this doesn't just work for my Freedom mop - it also works for a Swiffer as well. (and hopefully many more mops similar!)


I hope this is helpful! Let me know if you make a cover, I'd love to see how your's turns out! And let me know if you have any questions - I'm certainly no pro at sewing or at tutorial writing so I may have left something out! Or maybe you have some pointers for me! :)
So now it's your turn! What have you been crafting recently? I'm excited for you to share your projects!

Monday, August 17, 2009

This little light...

I found this little lamp a while back at a garage sale. I love the style, but it needed a new shade! So I came up with this: (which of course, matches the curtains!)


The black fabric seemed like it could be a little dark, but when I put it on the lamp and turned it on, the flowers popped out! :) It is just right!

It was a very easy project! I bought a self adhesive lamp shade at Hobby Lobby. And (per instructions) used the cover for a pattern, leaving a bit around the edges to work with.

Here's a tip they don't tell you, but it worked well for me: I started covering it by lining up the center of the shade with the center of the fabric - the seam of the shade facing up, and rolled the shade one way, then the other. It gave it a nice smooth finish - no need to iron!

I then trimmed the excess off the bottom. (The instructions say to glue it under, but it won't be seen anyway.)

And then glued my trims on. I started with this for the top, then decided I wanted a little more for the bottom.


Here is is again: I think it turned out pretty good!


It was an easy project, one that I would definitely do again!
hmmm... come to think of it, I need to straighten that fringe! Any ideas?? :)

Friday, December 19, 2008

Finished Object Friday


I made this cake Wednesday for Faithie's birthday.
She really liked it!
(When Regina and I were thinking about what kind of cake she needed, we both had the same thoughts: Faithie likes shoes and purses... Shoes too hard, purse... YES!) :)
Here she is with her cake:


This is really easy. I made two round cakes (9 in. pans):

Cut them in half ans stood them on the flat sides:

One of the best steps I took was to do a thin layer of frosting to "seal" it, then refrigerated it before I decorated it.

This layer kept me from having a bunch of little brown crumbs in my pink frosting!

And just to tickle your funny bones... here is another picture of the birthday girl!

She is so happy about the baby we got her! (This one replaces the old one with "punk rocker" hair and dirty outfit, which had been lost. It was her constant companion, much to her mother's chagrin!) :)
~~~~~~~~~~~~~~~~~~~~~~~~~
I know this isn't really a Christmas-y post, but I wanted to share the cake! :) I am excited to see what all of you have been up too, or maybe you have an older project you want to share. If you need to see the guidelines, click here.

Monday, November 10, 2008

How To - Chari Tree Style

First, allow me to make a special request. Sharon asked that I do this tutorial, and I would like to ask you to help me pray for Sharon and her daughter, Carissa. Carissa is facing some health problems and really need's a touch from the Great Physician. Sharon, please know that we are thinking of you!

~~~~~~~~~~~~~~~~~~~~~~~~~
I hope you all aren't tired of seeing pictures of this project:

This will be a picture-heavy post, and you will be seeing a lot of purple! :)

DISCLAIMER: I do not claim to be a professional seamstress! This is the little process I worked out to line my bags. I hope it is helpful to someone, but in the meantime, you professionals will have to excuse my attempts! :)
This tutorial includes options for pockets and square bottom bags. You can skip these parts to make just a simple liner. The pocket section will be in purple and square bottom part will be in green.

So to line the bag, first I found some complimentary fabric. This is more of a decorator fabric, so it is a little sturdier than regular cotton. Although most fabric should work fine.
1. Lay the purse on the fabric, and cut two rectangles, these need to be about a half inch larger than your purse on the sides, but an inch or two on the top. As you can tell, I'm not a stickler for exact measurements! :) This is the actual lining, one rectangle for each side of the purse, front and back.
(As you can tell, this is a little big... I have to fix that later, but better to be too generous than to not have enough fabric!)

2 Then cut two smaller rectangles for the pockets. (This is optional of course, or you could do one pocket.)
Here is the purse with all the pieces.


3. Pockets:
a. First fold the long edges of the pockets over twice and iron. (As a non-professional seamstress, I also use pins as little as possible, you professionals are welcome to use as many as you like!)


b. Then sew down each side. (usually going down one side of each twice to make a double stitch.) Then lay each pocket on the inside of the lining, and sew the bottom down. (creating another "double stitch.") (I'm probably making up my own terms, but it makes sense to me!) :)

I love this machine!!!
c. Then decide where you want to put the pockets:

and do vertical stitches at the intervals you want. I made small pockets on one side and bigger pockets on the other side. Be sure to back stitch back and forth at the top to strengthen the pockets.


4. Now it's time to finish the lining! Put the two sides together, right sides together:

and sew around all but the top.

5. My purse has a square bottom. (for other purses, just skip this step... only square it off if you need to.) ***This is going to be a little tricky to explain, so if it doesn't make sense, please let me know!!*** :) First flatten the bottom like this:

The bottom will come to a point:
The seam is the side seam and should now line up on the top and bottom of the corner.


This is how the inside looks (after I did a little ironing.)

Then mark where you want to sew with pins:


This marking should be about the same size as the bottom of the bag:

(Please excuse the lint... sewing in progress!)
Sew across both corners.
6. Finishing!
Fold the lining over once (and Iron)


Then again (and iron):

Then run a stitch along the top, about 3/4 of an inch down or so.

7. Almost done! Now you are ready to put the bag in the purse:

As you can see, mine is a little large, I had to go back and sew it a little smaller, but that is much better than trying to figure out how to make it larger! (also the picture was taken before I sewed around the top!)


Now you have to make a decision.
You can sew the lining using the sewing machine, or you can hand sew it in.
With hand sewing, you have a little more control of the process and hopefully don't end up with a pucker like I did on the machine!
(pucker on the right side of the purse)

The machine stretches the knitted fabric and I ended up with extra purse by the time I got all the way around. It's not too noticeable, but I will fix it when I take it apart to put the button in! :) The button is purchased, I just haven't got it in yet!

I hope you have enjoyed this tutorial and that it is helpful to you! Let me know if I need to claify anything. I would love to see the purses you have made! They are a lot of fun to put together, and a lot of fun to use! To see the purse I made last year, click here.

Blessings!

Wednesday, June 4, 2008

To make an apron...

I have a confession... I have become hooked on aprons! (It's almost as bad as my sock addiction!) I have several hanging in my broom closet, some new and some vintage. I will probably share them in a future show and tell, but for now let me share this one:


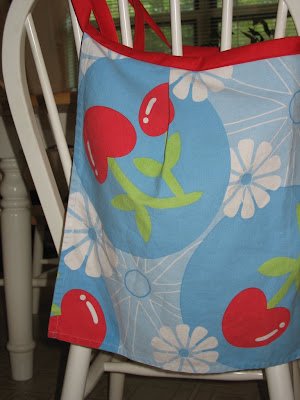
I made it from the cutest little dish towel! It actually came in a package with a matching potholder. I like terry towels personally for the kitchen, but I have a hard time passing up cherries. I decided to make an apron out of it and have really enjoyed it.

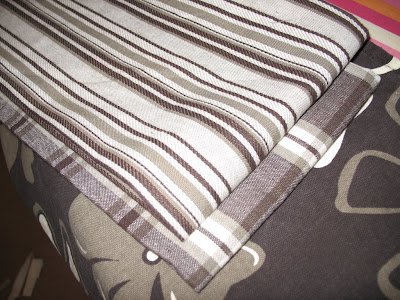
Regina's birthday was a couple of weeks ago and I decided to make her one. I have found really cute towels at Tuesday Morning. They have a great selection of these towels. I got this set of three:


I like the floral one. When you are looking for towels to make this apron with, look for ones with patterns that can go either direction and aren't decorated only on one end, or else the pattern will end up looking sideways!

The supplies you will need for your apron are as follows:
  • 1 (non-directional) linen type dishtowel, prewashed and ironed
  • 1 package of matching large 7/8" double fold bias tape
  • thread to match the bias tape or use a contrasting thread
  • sewing machine :)
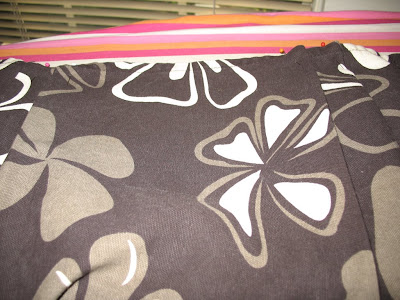
I first made pleats evenly spaced on either side of the apron.
(My apron has one pleat on each side, I like the two per side much better.)

Here is a video showing how I made them:

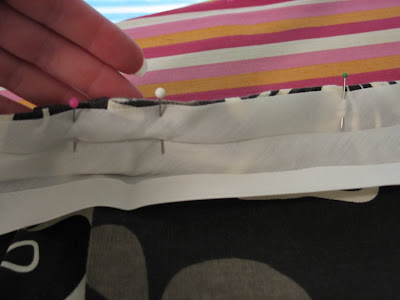
Cut tape to the desired length (I used about 80 inches.) and attach, be sure it is centered! (Here is the method I used to attach it. You might want to look around while you are there, Amy has some really cute sewing ideas as well as a apron group.)
I attached it just a little below the top, so that it would be completely on top of the towel without empty tape at the top.

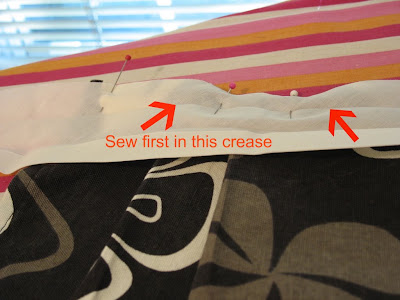
Sew first on the inside of the tape at the crease:

**at this point I am switching to my apron, I finished the brown one really late and forgot to take pictures***
then fold the tape over and sew again from the front starting at the end of the tie. When you reach the apron, the machine will catch the wider strip at the back. Take extra care at the pleats to be sure that the back is folded over enough and catching.


Like I said: Watch the Pleat! I missed a little here:


Tip: Tuck the ends in before you sew and sew down then across.


Here is the finished brown apron modeled by the recipient, Regina:

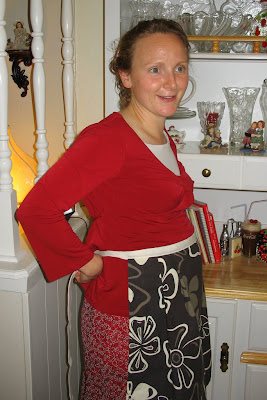
And yes that is a little pooch in front!! I have another little (adopted) niece or nephew coming in November! (She is actually exaggerating for the picture, she never gets very large even with almost a ten pounder last time - Faithie.)

Well, I hope you have enjoyed my little tutorial! I had a lot of fun making this and I am looking forward to making more. I would love to see your version, if you make one!

Blessings!


ETA: Thanks for stopping by, a big welcome to those of you from Tip Junkie! To see another apron I made recently click here. Feel free to look around! :)