Showing posts with label recipes. Show all posts

Friday, March 9, 2012

Finished Object Friday - S'mores Cake

You may have noticed I have been out of pocket for a while! Sorry about that. I had something unexpected come up that was out of my control and it took up several days. But I am recovering from that busy time and am getting everything back on track. (Washed several loads of laundry last night... now to just get it all folded!!) :)

So, FOF is a week late, but we'll just pick up from here, if that's alright with you! ;)

I made this cake a few weeks ago.


You talk about YUMMY!!! The cake recipe is the one that I use for basically all the cakes I make. I realized recently that I have never posted the actual recipe here. It is always soo yummy and moist - and VERY easy. A good "first cake" for young bakers.

Here's the recipe:
Wacky Cake (or Chocolate Stir Cake)
Preheat oven to 350 degrees

sift:
1 1/2 cup flour
1 cup sugar
3 tablespoons cocoa
1 teaspoon baking soda
1/2 teaspoon salt

Add:
1/3 cup vegetable oil
1 tablespoon vinegar
1 teaspoon vanilla
1 cup water

Stir in liquid ingredients until flour is consumed. Pour in 9x9 in pan. Bake 30 minutes or less (until an inserted toothpick comes out clean.)


Just some tips:
  •  Greasing the pan isn't necessary unless you are removing the cake to decorate it. In fact you can mix it all up in the pan you are going to bake it in if you wish!
  • For a 9x13 in pan, I double the recipe.
  • And yes, there are no eggs!! I love tasting the batter! :) (and I've made it enough, I would probably know if I missed an ingredient!) 
  • for something yummy, quick and simple, you can do as I did in the picture above. Just top it with plenty of marshmallows and chocolate chips and broil until the marshmallows are toasted. SUPER yummy! And you for this you can bake the cake the day before then add the toppings and broil just before serving.


So maybe you've made this cake before? Or maybe you've made something else in the last few weeks! Anyone else ready for some spring crafting? :)


Monday, June 20, 2011

Summertime Treat

104 degrees. Really. It's only June. (I worry about what August will bring!) With that kind of heat here in East Texas, our main concern is keeping cool! (Thank you, Lord, for air conditioning!!!) Of course, cool treats are a must for summer. I wanted to share these popsicles I came up with - so light and yummy and pretty healthy too!!


I got this popsicle mold last month and I'm kindof wishing I'd bought two! My "recipe" was kindof by accident... I made this dessert for my mom's birthday, and had some leftover jello mixture. So why not try freezing it? Those were some of the best popsicles!! YUM! The best part is that the whipped topping makes a softer frozen treat - no teeth chipping! :) My second batch didn't have as much whipped topping, so the mixture separated a bit before it froze - still good, but I liked the first better.

Here is my first batch ready to eat:

(Yes, the top picture does have plastic knives in it. I find the ones with holes in the handles work best to keep the treat from sliding off. Spoons would be a little safer, but knives work fine for adults.)

I think these would be great for kiddos - you can stick all kinds of goodies in there! They can be eating healthy and not even know it! I make these with minimal sugar and my last batch I used blueberries, blackberries and strawberries! (but no nuts this time.)

Do you have a favorite popsicle recipe? Please share! I'd love to try some new ones!! YuM!! :)

Saturday, November 27, 2010

Last Harvest..

...for this years garden. These cool nights we've been (finally) having finally got to it! I need to go pull the plants! but first here is what I've picked so far:

See those tomatoes in the corner? That is just a handful of what's left out in my garden! What to do with all those tomatoes?? They're still green!! I'll show you what I did with the few I've picked so far...

Fried Green Tomatoes!! YUM!! A good ol' southern favorite! And yes, people still make this, although Mark wasn't sure he had tasted it before. He wasn't so sure after the first bite, but then he took another... He decided that they do grow on you! Here's the process:

Items needed:
Green tomatoes
flour
egg wash - I put a little milk in mine
cracker crumbs
oil for frying

here's how:

I fried them until they were tender:


And then sprinkled them with salt (go easy... I got mine just a tad salty.) :)

YUM!

We had ours with black eyed beans and snaps with rice. I drank iced tea... how's that for a southern meal?

Anyone else had fried green tomatoes? Oh and any other ideas on how I can use up my tomatoes? I'd hate for them to go to waste! :)


Monday, September 13, 2010

Let Them Eat (Funnel) Cake!


Recently I've had a craving for something fluffy, fried, and sugary. (Healthy. I know!) Sunday evening, we invited my family over for snacks after church. After an oh-so-healthy meal of tuna, chips and popcorn, I started frying!


I quickly realized that funnel cakes aren't a one (wo)man show and I called in help. Pretty soon we had an assembly line going.

I would put the batter in the oil, Mom flipped the cakes and took them out, then we handed them off to Angie who had the fun task of sprinkling the sugar on top!

Let me tell you, it does make a mess in your kitchen! Not to mention your faces (especially if you plant your face in the powdery plate for a photo op!!)  :)


(oh, and Dad and Mark helped us eat them... but I don't think they are as into photo opportunities!) :) It probably would have been easier and less mess with one of these kits, but just as tasty either way!

Here is the recipe below. I had to add more milk to get the cake to go through the funnel, this made for smaller "noodles" and more yummy goodness!!


 Ingredients:
1 egg
2/3 cup milk
2 Tablespoons sugar
1 1/4 cup flour
1/4 teaspoon salt
1 teaspoon baking powder

Funnel Cake Directions:

1. In a deep skillet, heat about two cups of oil over medium-high heat until hot. Test the temperature by dropping a pinch of flour into the hot oil. If it sizzles right away without smoking, it's perfect.
2. Beat egg and milk. Mix all other ingredients in a separate bowl and slowly add to the egg mixture, beating until smooth.
3. Using a funnel, drop into hot oil working from center outwards in a web pattern. (You can use a gallon sized freezer bag instead of a funnel by pouring the batter into the bag, snipping off a small corner of it, and squeezing the batter into the oil.)
4. Cook for about 2-3 minutes, remove from the oil when golden brown and crispy.
5. Sprinkle with powdered sugar and serve.

(recipe found here)

Oh, and after you finish the first beautiful cake, you take a picture and text to a couple of friends who you know will get very jealous and threaten to head right over to your house!! :) ...all in good fun, of course!

Thursday, April 22, 2010

Quick Hi and a recipe...

Well, I didn't plan a leave of absence, but this week has absolutely flown by! Hard to believe that Friday is almost here! I hope each of you has been having a good week. Mine has been busy with homekeeping and work and various other enjoyable things. :) I wanted to share this recipe with you. I made them for our Spring Tea and thought you might enjoy them as well.


Sandwich Wraps
Ingredients:
1 package of cream cheese
2 T dijon mustard
3 green onions finely chopped
1 Package of flat bread (I used this.)
Baby spinach
Lunch meat (It took 2 small packages for 6 wraps - it just depends on how much you want.)
Roasted red peppers (in a jar on the pickle aisle)
Sliced cheese - (I used a pre-sliced cheddar cheese - not the processed sandwich cheese.)

Mix cream cheese, mustard and green onions together. Spread evenly on 6 wraps. Lightly press a layer of spinach onto the cream cheese mixture. Lay a few strips of the sliced red pepper on the spinach. Then comes a layer of meat and then cheese. Roll the wrap up tightly and cover with wax paper or saran. Chill about an hour. Slice before serving. Makes about 40 wraps.

You could make up the cream cheese spread and store it - making the wraps up when you are ready for them - 6 wraps is a lot to eat - these are very filling! And SOOO yummy! My Sister-in-law made these for Mom's birthday party and they were soo good, I just had to get her recipe for our party. I will be making these again - maybe soon, as I still have some wraps left (I bought two different kinds.) :) Enjoy!

Tuesday, January 19, 2010

Happy Popcorn Day!

Did you know that today is National Popcorn Day? Me neither until just a little while ago. :) But what a great day... Popcorn is one of my very favorite snacks. Of course I had to go pop some, but no plain stuff for me today:


YUMMY!!!

This is a no-bake caramel popcorn recipe that we've made for years. I thought I would share it with you "in honor of the day!" (Of course, each day is a reason to celebrate, right? Such a precious gift from God!) Actually, I think I am going to mark this day on my calendar, after all the excitement of Christmas, it's nice to have something else fun for January.


No-Bake Caramel Popcorn
Melt: 1 stick butter or margerine
1 cup brown sugar
Add: 1 cup corn syrup
Bring mixture to a boil and boil one minute.
Remove from heat and add 1/4 teaspoon baking soda.
Stir into popped popcorn.
(I did about 3/4 cup unpopped popcorn. I use an air popper- buy one, you won't regret it. It has pretty much spoiled me for microwave popcorn, and it's healthier too... depending on how MUCH butter you add... ahem.)

Happy Eating!!

Wednesday, September 30, 2009

Apples and cinnamon...

does it get much better than that??

I am so enjoying this fall weather. It has been beautiful in East Texas! I have my windows open, and am really enjoying the fresh air!

Last night I did a little fall baking. I wanted to try this recipe from Pioneer Woman, Apple Cake in an Iron Skillet.

Wow. Yum!


Here it is ready to eat!


It really doesn't get much better than that! I even ate a bit warmed up for breakfast! (shhh.... don't tell my nutritionist! wait... what nutritionist? Pass the apples!) :)

Coming up next... Finished Object Friday!!

Tuesday, September 15, 2009

Early Fall Baking

I have enjoyed our weather the last several days! We had desperately needed some rain, and it has rained every day since Friday! It has also cooled off - so nice!! But enough of the weather report! This cooler weather has got me in the mood for some baking!


Molasses Crinkles (or Ginger Snaps)
Mix thoroughly:
3/4 cup shortening
1 cup brown sugar
1 egg
1/4 cup molasses

Sift together:
2 1/4 cup flour
1/4 teaspoon salt
2 teaspoon soda
1 teaspoon cinnamon
1 teaspoon ginger

Stir the dry ingredients into wet mixture. Chill dough. Roll into walnut sized balls and dip the tops in sugar. Place sugar side up 3 inches apart on greased baking sheet. Bake 10-12 minutes on 350 degrees. (I didn't grease my stainless steel pan and they came off just fine.)

Enjoy!! I do have my fall decorations up. I am enjoying them! :) I did things a little different from last year, but most is similar - I'll do a little tour later. I do need to get some "twinkle" lights for my mantle. I enjoy all seasons as they come. I enjoy the coziness of fall time, Thanksgiving, and looking forward to Christmas! :)

Wednesday, August 26, 2009

Bake these muffins...


Your taste buds will thank you!! :)

Banana Muffins
1) 1/2 cup softened butter
2) 1 cup sugar
3) 2 eggs
4) 3 ripe bananas
5) 1 1/4 cup flour
6) 1/2 teaspoon soda
7) 1/3 cup chopped nuts (optional)

Mix ingredients in order. Bake 350 degrees for 20 minutes. Makes 12.

YUM! I got this recipe from a family friend when she was through for a visit! They are soo good, I might not make banana bread again.... :)

Tuesday, June 23, 2009

Chari Tree Chat

My week is off to a good start. Monday morning I got up early - well, early for me! and went blueberry picking with Mom and Angie. We got there early enough that it wasn't too hot. It hasn't been the best year for berries down here, but we did find some good bushes and got some picked. I enjoyed a smoothie yesterday - blueberry and peach. I'll probably have another one today. :)

Speaking of cooking, I feel like my basic menu list is a little short. Now that I have more time, I am going to be looking for recipes and try a new one each week. When I decide on a recipe before hand, I can get what I need on my weekly shopping trip. (How many times have I looked at a recipe and not had a necessary ingredient to try it!) Last night's trial was a success!

I made Creamy Bow-Ties with Broccolini and Ham. (Whatever broccolini is - I just used fresh broccoli - and the cooking time for it was perfect - tender crisp!) I would probably add a little more flavor next time, but Mark loved it - so it was a success! :) ( He's a pasta/bread kind of guy - maybe there's some Italian blood in there - it sure runs in the family!) :)

I have a running list of my go-to recipes on my computer, and when I feel that it's "finished," I will post it on the inside of my pantry door. My goal is to keep the ingredients on hand for several of our favorites. We also eat leftovers a lot, so I only cook about three times a week! (We usually have pizza on Fridays, anyway. Hmm... maybe we should try for something healthier.) Do you do anything like this? I know some do menu plans, but when it comes to that day, I usually feel like making something different! :) And when I don't feel like cooking, that is usually when I pull out my recipe books and try something new. Funny me! How do you chose what to cook?

Wednesday, October 22, 2008

Pumpkin Tea Party: The Menu


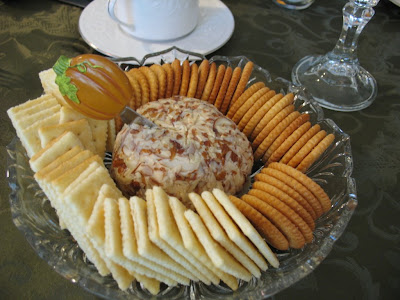
Amanda asked what was on the menu for the tea party. Thanks, Amanda! I'm glad you brought it up. :) Unfortunately I/Angie didn't think to get many pictures of the food. I tried to set it up cute. (There are a few things we are wishing we got better pictures of. Oh, well.)

Tea Party Menu:
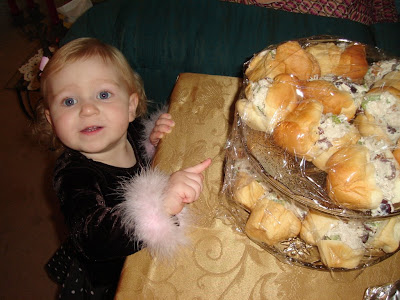
Chicken Salad on rolls
Cornbread Salad
Garden Vegetable Cheese Ball with crackers (above)
Crab and Pasta Salad
Pumpkin Bars
Pumpkin Cookies
Peanut Butter Candy Cookies
Gingerbread Scones

For tea we had
Apple Cinnamon
Very Berry
(Regular) Black Tea
I also had sugar cubes, sugar substitute, and honey sticks for the tea.

Somebody's hungry! :)

This picture shows how I displayed the sandwiches. It is a cake plate on top of a platter. I love the tiered effect! (Thanks, Angie for the picture!)

Wednesday, October 15, 2008

Yum, Yum, Yum...


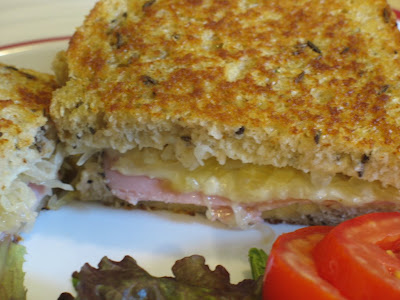
Hmm... is your mouth watering yet? Cause mine sure is! Wow!
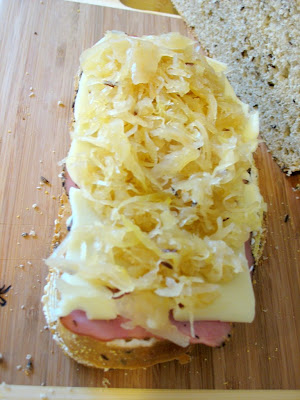
This is a perfect sandwich for fall and there is just something about the flavor!

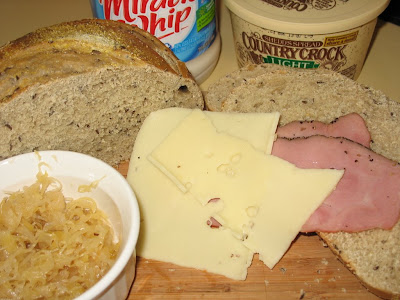
First, the ingredients:


  • Rye Bread
  • Turkey pastrami
  • Swiss Cheese
  • Sauerkraut
  • Butter and
  • Miracle Whip (or other condiment of your choice)
Build your Sandwich:


Butter both slices of bread and put the Miracle Whip on the other side of one slice. Layer pastrami, cheese then sauerkraut.


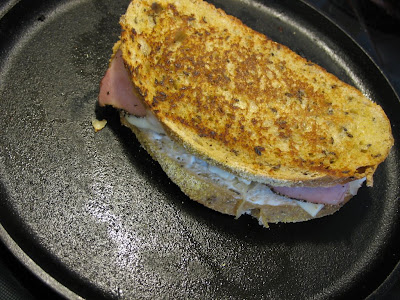
Grill until golden on both sides, and the cheese is melted.


Then serve!

I didn't think I was hungry, but I think I am after this post! I know not everyone is a fan of sauerkraut (Mark isn't) but you might like it in this recipe! It's great in this sandwich. I ate mine with some salad but a yummy soup would be good too. Any suggestions?? :)

Hope everyone is having a great week!

Blessings!

Monday, October 6, 2008

Domesticating

My days have been so full recently, running here and there. I haven't really had time to putter around the house the way I like to every now and then. In general, I savor my times at home. As you know, I enjoy "wifey" things like sewing, baking, crafting, decorating and (sometime) cleaning. I like it when our home is in order, and Mark appreciates it as well! :) So today I have really enjoyed my time "domesticating."

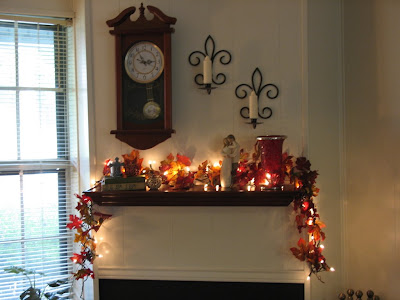
I did a little decorating:

I added little lights to my fall mantle decorations. I love the warmth they add to the room!

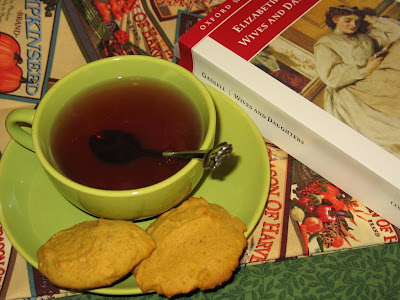
I also did some baking and took a little time to enjoy the fruits of my labor.
A cup of tea, warm pumpkin cookies (recipe here) and a good book.

The cookies are very good, they aren't supper sweet and kind of remind me of a scone. I bought the tea cup for a dollar at a flea market Friday along with several other glass dishes that I collect. The fabric is for some fall napkins that I hope to get made before fall is over! :) Oh, and the spoon is for my mother-in-law for her birthday. SHHH! :) It's so cute though, I may have to buy me one! :)

Now I'm off to finish the rest of my to-do list... laundry etc...

Happy Monday!!!

Saturday, December 15, 2007

More Christmas Goodies

Yesterday I got a little Christmas baking done. Basically, the sugar cookies that I make every year. This is my Great-grandmother's recipe. They are really easy to make with my handy cookie press! Someone gave me this a few years ago and I love it! It is sooo much faster than rolling and cutting each cookie by hand, and they look great! Also, I had made a quick batch of brownies for Mark to take to his office party. There were several left so I cut them up and decorated them to take to our church dinner.

I cut a Christmas tree shape out of wax paper, put the shapes on the brownie bites and sprinkled with powdered sugar.

Also, I copied Melissa's idea for a cheese ball snowman! He was really fun and easy to make! Everyone liked him... I guess he's pretty likable! :)


Here is the recipe for the cookies:

1 1/2 C flour
3/4 c sugar
1/2 t baking powder
1/8 t salt
1/2 c butter
1 egg
1/2 t vanilla

sift dry ingredients
mix in butter and add egg and vanilla
roll thin on floured board and cut into desired shapes, dough may be colored with food coloring.
bake 8-10 minutes 350 degrees

I have to have a less stiff batter for the cookie press, so I add a couple of tablespoons of butter and all the butter I melt to a liquid. I have to keep the batter from getting too cool, or the press is cantankerous! :)

And the cheese ball recipe... super easy
1 package cream cheese
1 can of ham
1 t powdered ranch salad dressing mix

mix together and form in desired shape. Decorate as desired! :)

Monday, December 10, 2007

Christmas Goodies

I did get the fudge made Friday night! Both recipes turned out yummy! I make both of them using the microwave - I worry about burning things on the stove. They are both creamy smooth recipes, and so good!
The ornaments to the right are a craft Mom and I saw demonstrated at Hobby Lobby. You buy the plain ornaments , these are iridescent, and drip paint along the edge inside, then tap it against your hand. "Divide" the ornament into thirds with your main color and then add the contrast. Continue tapping until the paint coats the inside of the ornament, then turn upside down in a disposable container for at least 24 hours for the paint to drain and dry. The dripping gives it a more swirled effect. I did these at kids club last night and the kids really enjoyed them. They are a lot of fun to make!

Here are the recipes for the fudge:

Milk Chocolate fudge
1 bag milk chocolate chips
1/2 bag semi-sweet chocolate chips
1 can sweetened condensed milk
1 teaspoon vanilla
3/4 to 1 cup of nuts (optional)

Melt the first three ingredients together in microwave safe bowl until smooth. Add vanilla and nuts. Pour into 9x13 pan lined with foil or wax paper and chill until firm. (about 4 hours) cut into desired size and serve.

White Chocolate Macadamia Nut Fudge
3 Cups white chocolate chips
1 1/2 cup miniature marshmallows
14 oz. canned sweetened condensed milk
2 teaspoons orange zest (or a little less for a less citrussy taste.)
1 teaspoon vanilla
1/8 teaspoon salt
1 cup toasted, chopped macadamia nuts (I used 1/2 cup)

Melt first three ingredients together until creamy smooth. Add zest, vanilla, salt and nuts. Pour into 9x13 pan lined with foil or waxed paper (and sprayed with a little cooking spray) Refrigerate four hours or until firm.

Tuesday, October 23, 2007

You're Invited...


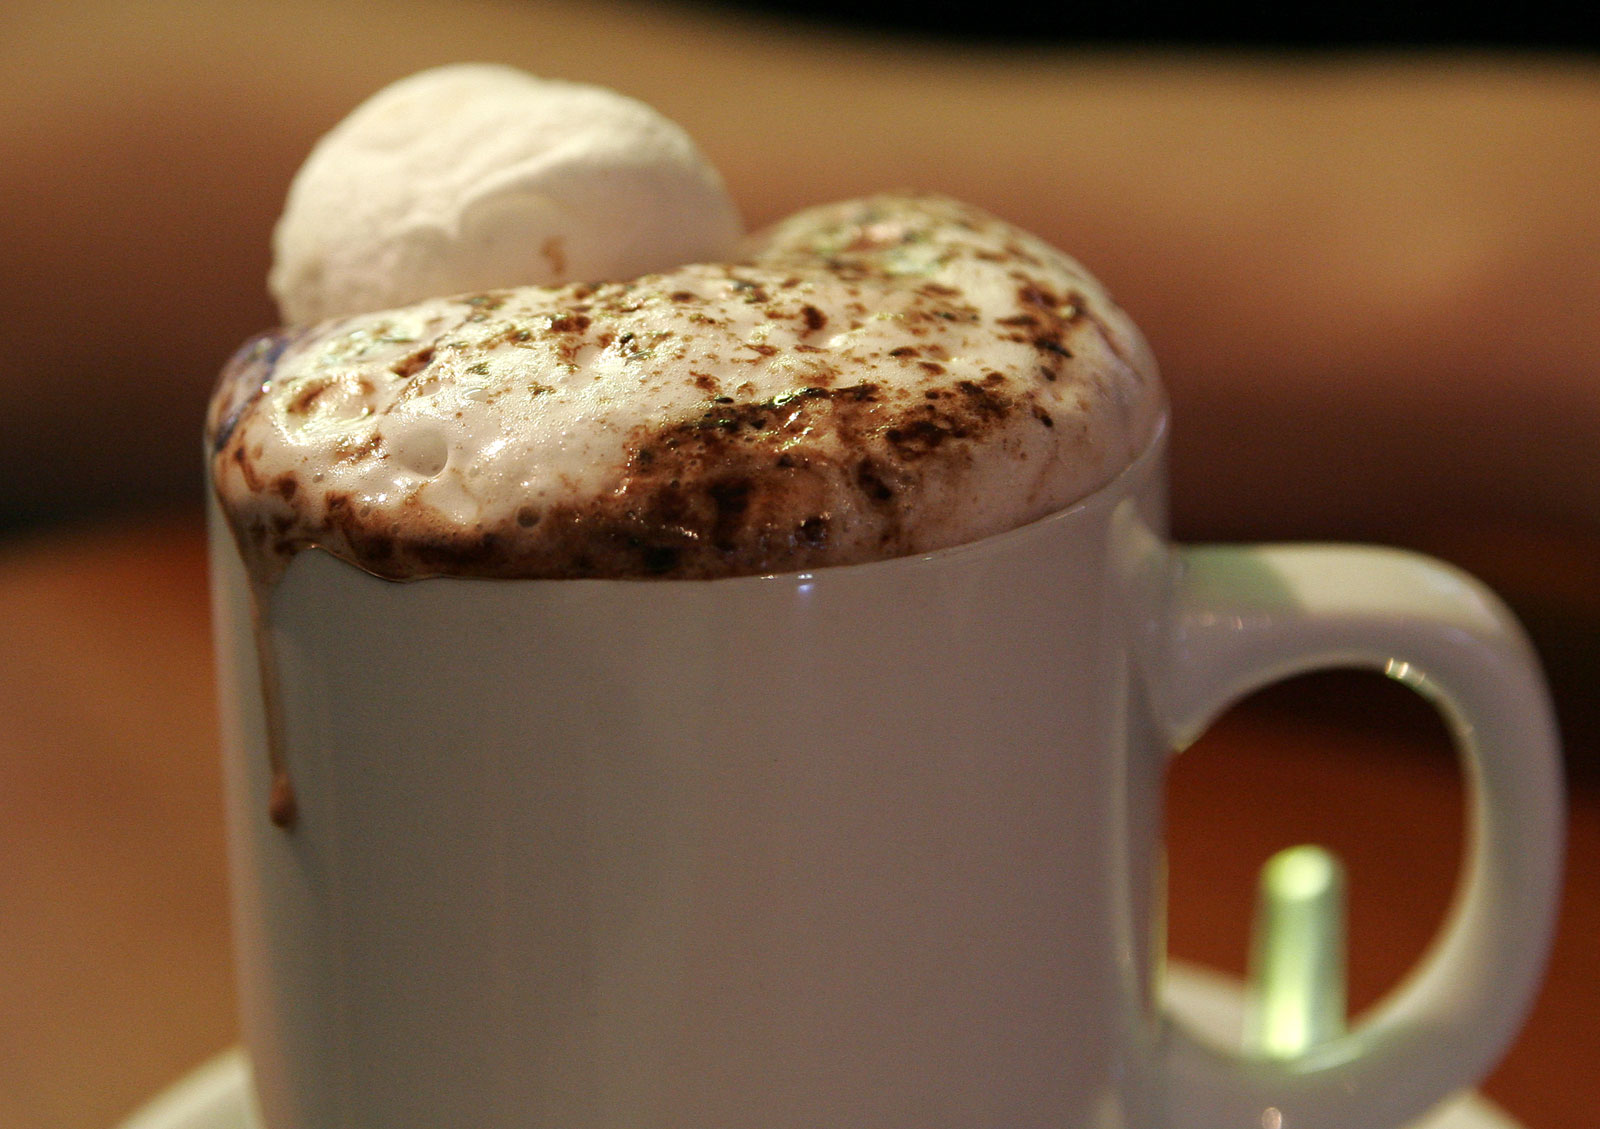
To my house to enjoy a cup of hot chocolate and maybe some banana bread! I would love to sit down with some of you that I haven't seen in ages and have a nice long chat! (Thus this virtual invitation!) The weather here has finally turned a little cooler! Sunday's low of 61 degrees was yesterday's high!! :) It was wonderful to pull out a sweatshirt to wear! It was rainy and just felt like a wonderful day to sit and enjoy a chat with a friend! I picked up the ingredients for hot chocolate mix and mixed up our first batch for the winter! I took just a few minutes to sit and enjoy my hot chocolate, with marshmallows, of course, and read my new Southern Living magazine that surprised me in the mail. (I don't know yet who subscribed for me, but I know I am going to enjoy it! I have my suspicions!) I was thinking how much I would enjoy having some of my friends over to visit! :)

Well, since most of my readers are so far away, I hope you enjoy this "virtual" cup of hot chocolate! or you can get literal and mix up a batch of my Mother-in-law's recipe for hot chocolate mix!

Hot Chocolate Mix
1 lb. chocolate milk powder (such as Nestle Quik)
4 qt. equivalent of powdered milk
8 oz. powdered creamer (or more)
1 lb. powdered sugar

Mix together and store in a covered container. It keeps well - my cup yesterday was actually the last little bit from last year. To serve, mix about 3 T in a mug of hot water. (The amounts of the ingredients don't have to be exact, for example the chocolate milk mix I get is 15 oz.)

Tuesday, September 25, 2007

Yummy!!!


I tried out a new recipe yesterday: Gingerbread Scones. I love scones and this was my second try at them. It's a wonderful fall smell! :)


Gingerbread Scones
  • 2 cups all-purpose flour
  • 3 tablespoons brown sugar
  • 2 teaspoons baking powder
  • 1 teaspoon ground ginger
  • 1/2 teaspoon baking soda
  • 1/2 teaspoon salt
  • 1/2 teaspoon ground cinnamon
  • 1/4 cup cold butter
  • 1/3 cup molasses
  • 1/4 cup milk
  • 1 egg, separated
  • Sugar
Directions: In a large bowl, combine flour, brown sugar, baking powder, ginger, baking soda, salt and cinnamon. Cut in butter until mixture resembles coarse crumbs. In a small bowl, combine the molasses, milk and egg yolk until smooth; stir into the flour mixture just until moistened.
Turn the dough onto a floured surface; knead gently 6-8 times. Pat into an 8-in. circle; cut into 12 wedges and place 1 in. apart on a greased baking sheet. Beat egg white until frothy; brush over scones. Sprinkle with sugar. Bake at 400° for 12-15 minutes or until golden brown. Remove from pan to wire rack. Serve warm. Yield: 1 dozen.


They were very good... especially with coffee. I got the recipe from Taste of Home... I love their recipe site and having my own "recipe box." (direct link to recipe here.) The picture above is theirs as well. I didn't think to take any of mine... and they are almost all gone now! :)